DIY | How To Build a Bridal Show Booth For $100
February 12, 2018
 DIY Quick Bridal Show Booth For $100 | Photography Education
*Updated February 2, 2023*
I have to be upfront with you and let you know that until now, I’ve never had a bridal show booth or a table at an open house. The reasoning why is for another blog post, but when I found out I was having an 8 foot table all to myself at a local open house, I had FIVE DAYS to get my act together, and I came up with a full display for $100! Here’s how to do it…
*see updates below now that I’m a bridal show pro ;)
1. Choose Your Display Photos
First things first! You need some beautiful photos to display and catch a bride’s attention. Think about your brand and three words that describe your style. For me, my style is joyful, timeless, and romantic, with a big emphasis on JOY. So, I chose 6 images that were going to be my display photos(see photo below). The key to this is to make sure you have different crops and frames for each photo so they don’t compete with each other. I alternated up-close photos with photos that had more landscape in them. Then I scattered 4×6 images around the table with some of my favorite images. I had 20 printed, but 10 would be sufficient. I was beginning to run out of room!

Related Video
2. Don’t Buy Canvases!
Canvases are expensive and take double the amount of time to print and ship. Mounted prints are the way to go! They’re light, have true-to-life color, and they’re much more affordable. I printed all of these display images as seen above PLUS 20 mounted 4×6 prints for under $100. And the best part? They were at my door in TWO DAYS! I typically use Millers Lab for my regular printing needs, but their mounted prints are more expensive than I wanted to pay (especially since I wasn’t sure they would arrive on time!) So I ordered from Pounds Lab in Dallas and saved over $50! I will definitely be ordering from Pounds again!(update: Pounds Lab closed. I’ve been using Millers lately)
3. Display Stands
 After I figured out that I wanted to display mounted prints at my table I realized I needed something to display them with! I found some great stands on Amazon Prime that adjusted the angle of the print AND they were SUPER CHEAP! You can find them by clicking here.
4. Table Accents
 I knew I was getting an 8 foot farm table (I know we can’t all be so lucky!) so I didn’t have to decorate very much as far as linens go (usually white linens are supplied by the bridal show, just FYI). So I went with a chiffon table runner for a classic, romantic look. It was also on Amazon Prime! This is the one I bought. I ALMOST bought this one, but I decided that it might look too rustic with the wooden farm table, so I stuck with the chiffon. At 120 inches it was the perfect length to spread across the table and scrunch it up a bit.
Related: DIY Painted Photography Backdrop
5. Business/Rack cards
You need something for your future clients to take home with them so they can get in touch with you! This is my favorite vendor for printing business cards and rack cards. They always have great sales and you can get business cards for less than $15!
6. Albums
Albums are an investment, but clients love having them to look through. It will keep them at your booth for longer, so if you have the budget to buy some sample albums they are a great investment! I order my sample albums from Miller’s and their turnaround time is CRAZY FAST! I’ve had them delivered to me within 48 hours before! They also have seasonal sample sales where you can get them 40% off!
Overall, I was very happy with my table! I did forget to print out my logo (I probably should have ordered a mounted print of that!), but I had rack cards and business cards on the table that had that info on them. I also would have brought a stool to sit on if I could have a do-over. I don’t think regular chairs are a good idea because they’r uninviting (unless you’re having a lounge area), but a stool allows you to be accessible to your future brides without getting achy feet. MY BIGGEST REGRET: Not bringing my plaques from The Knot that I have won for the past four years!
Next time, Next time…
While this information may not be life-changing or ground-breaking, I think it is affective! I have seen people spend hundreds or thousands of dollars on their bridal fair booth and come home with ONE booking. If you follow these steps you will have an elegant booth that doesn’t break the bank. Sometimes less is more!
Update
It’s been a *few* years! Here’s my “booth” from my last open house(see details below):
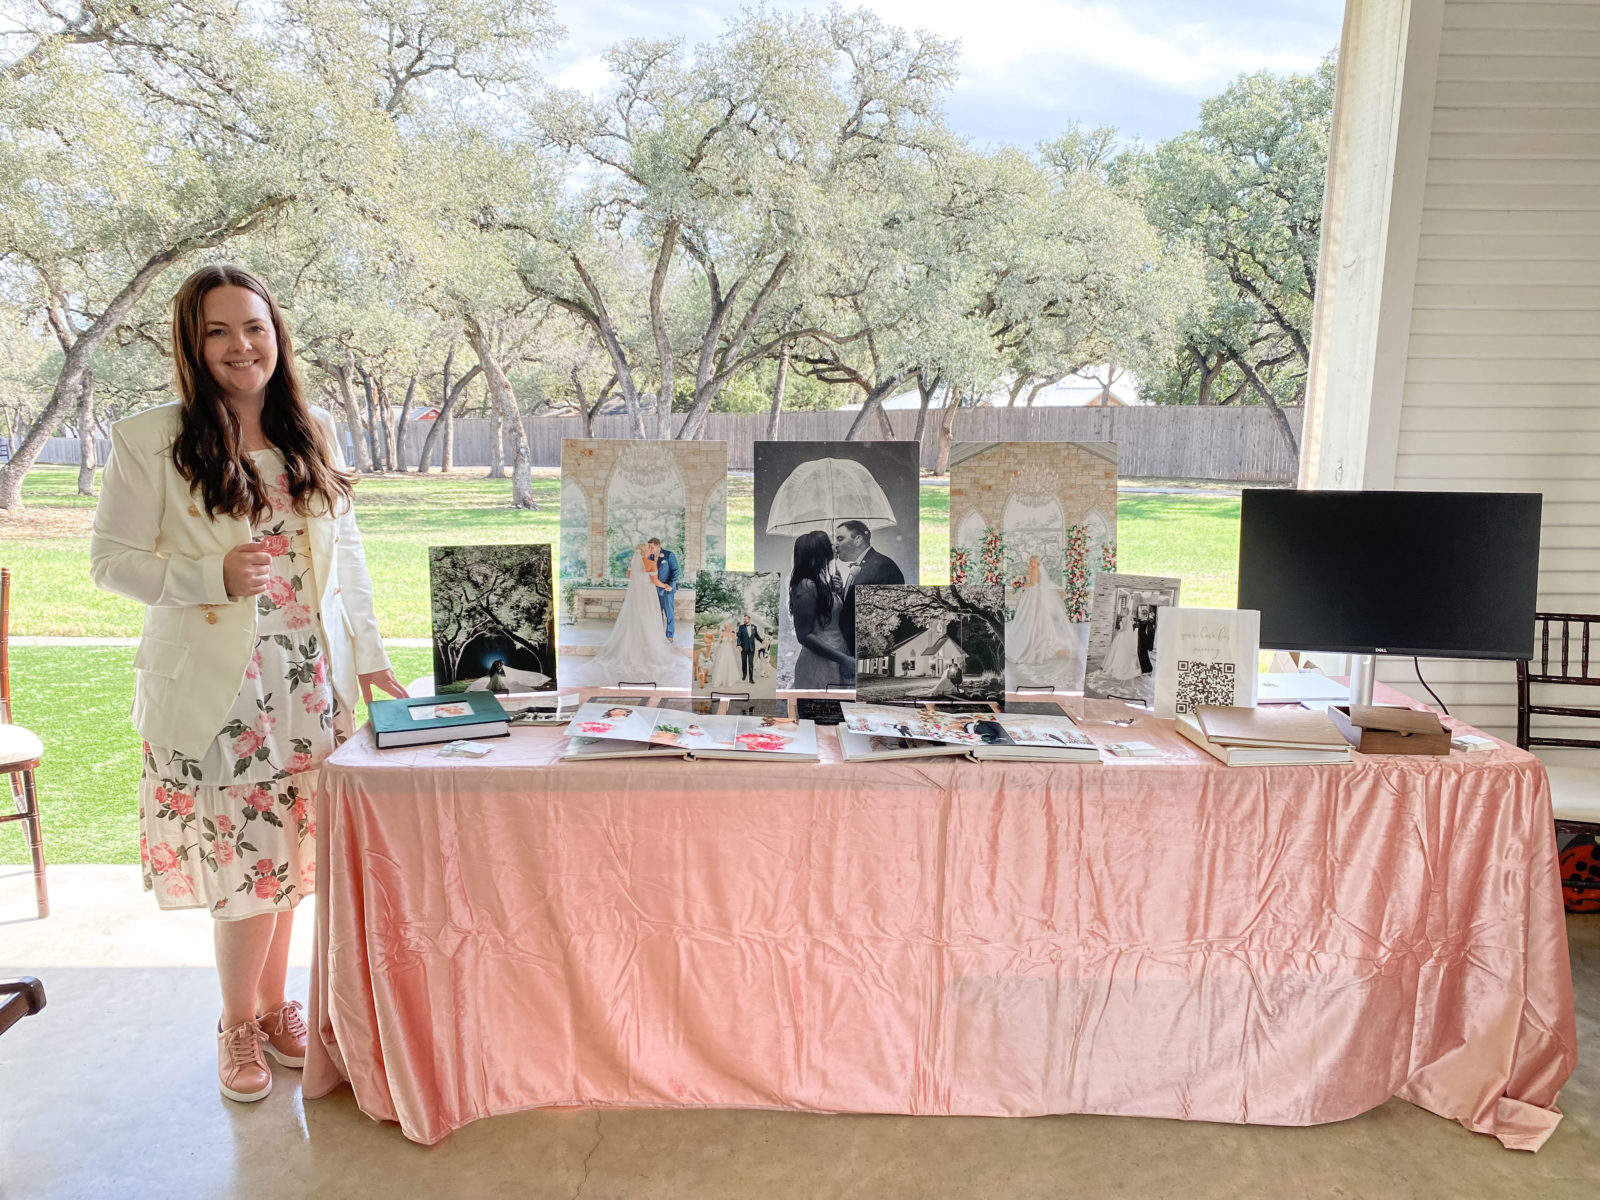
While the tablecloth is in DIRE need of some steaming, I love how it all came together! This is my favorite setup I have done. I have three vertical 16×24 prints (double weight matte board), an 11×14 vertical and horizontal, and two vertical 8×12’s.I also bought this monitor that mirrored a slideshow I made in Lightroom. This comes in handy when I’m doing a smaller open house and don’t necessarily need to print out a bunch of photos from that particular venue. It gets expensive!
I also made a QR code that led them to a signup form and then took them to my pricing guide. It added them into my Dubsado account and created a project for each couple who inquired. It saved me HOURS of work post-show! If you’re interested in trying Dubsado you can get 20% off here! I’ve been using it since 2017. It has streamlined my inquiry and booking process, and I’ll be a forever fangirl.
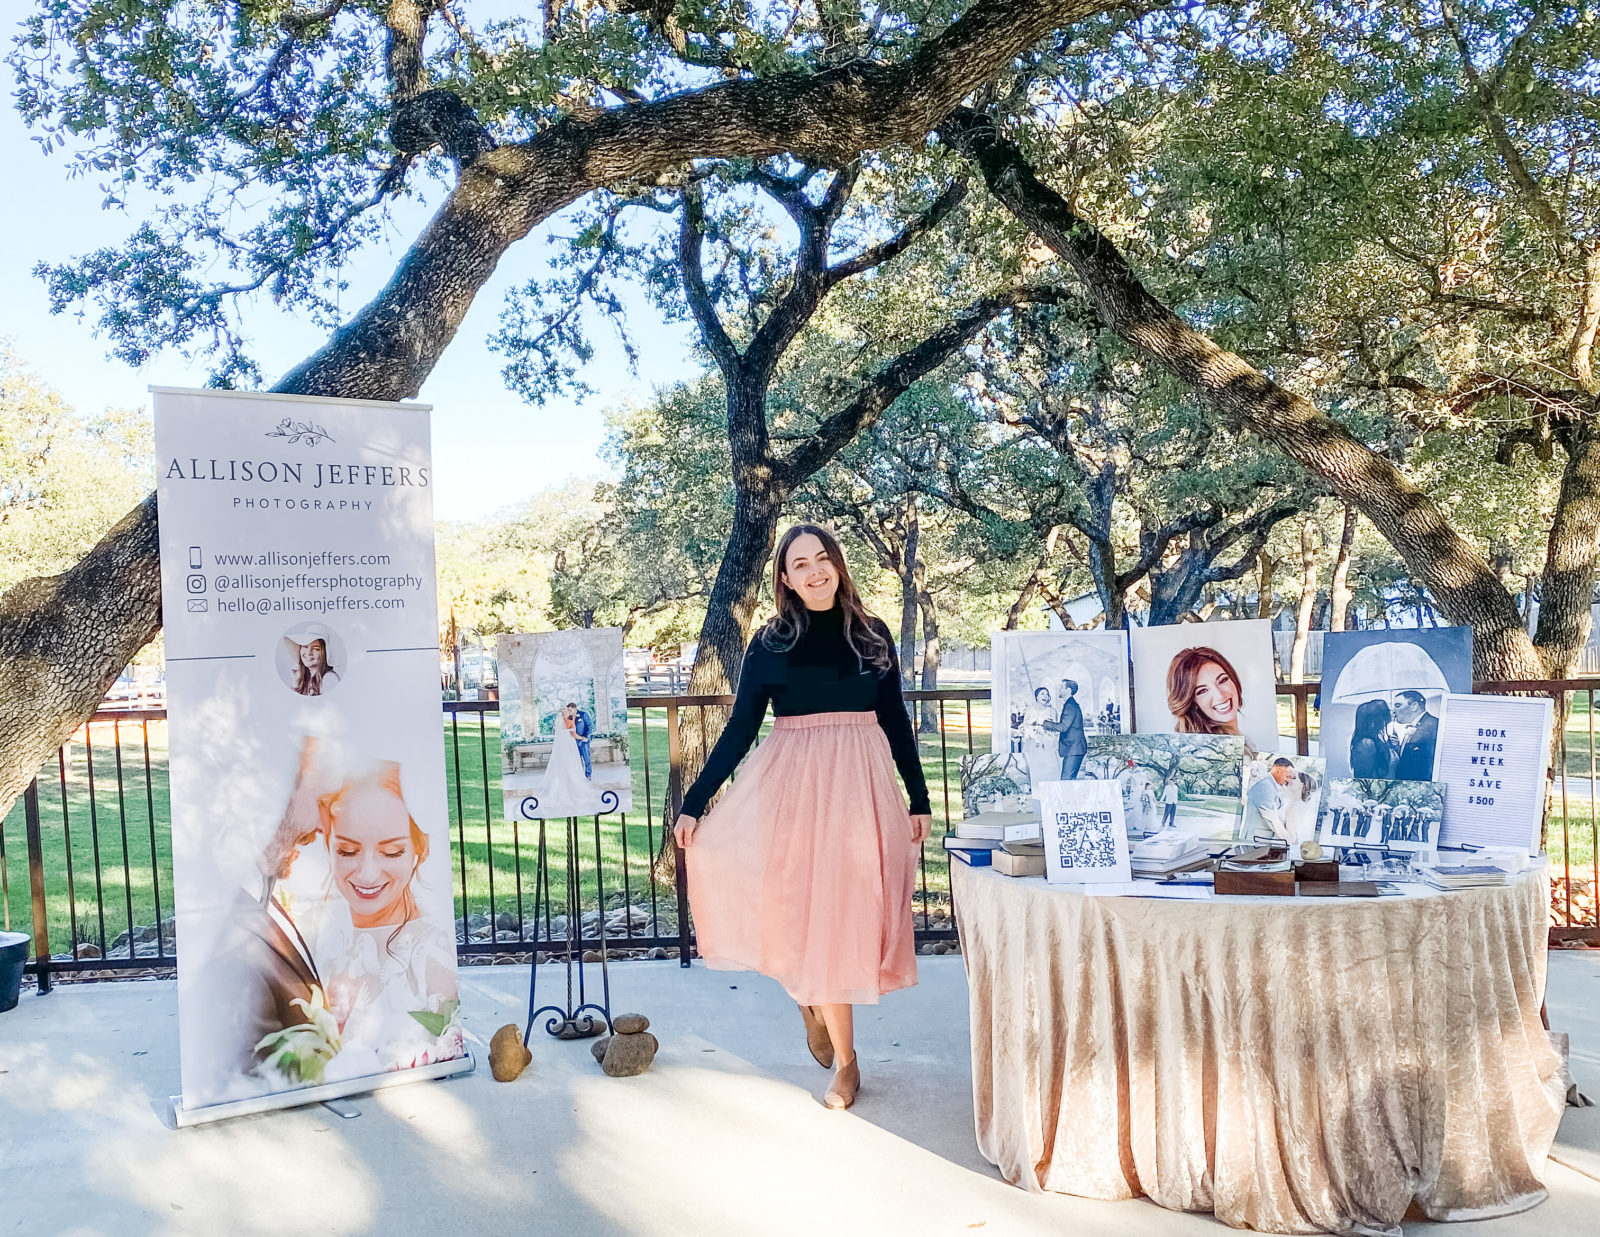
The only thing I am missing on this table is a SIGN! lol. I already made a mental note for next year. Here’s my sign from my last open house. I didn’t feel like toting it along this year, but didn’t think about replacing it with a smaller table sign. Side note: This table was way too small for all of my stuff and the wind gusts of 30mph kept blowing everything over, so I borrowed some rocks from the venue’s landscape to hold everything down. It was chaotic, but it worked!
See more of our educational content here!
Related Video:
Feel free to comment any suggestions you have for bridal show booths!
Love you guys!
xoxo,
Allison
xoxo, Allison
Allison Jeffers is a photographer and educator serving sweet couples and helping other creative entrepreneurs reach their goals. She specializes in wedding photography, elopements, and proposals as well as Bridal and Engagement portraits in Texas. She is available for travel worldwide and has her passport ready!
I love the way your blog is setup, I am looking for a more effect way to setup mine up. Would you mind telling me what yours is? I see that it maybe show it. But I like the things you are able to put into your blog like your videos and images. Please let me know. Thanks!
Thankyou! It is setup on showit and I use the classic WordPress editor :) other than that, I’m not sure if there’s anything else that’s fancy Lol
Which material/weight did you order for the mounted prints?
Hi! The ones that are medium/small size are single weight mat board and the big prints are double weight! I also have one mounted on Masonite but that’s overkill
Which ones would you consider medium/small size? I am working on an order now but it is getting pretty pricey so I am just wondering if I am choosing double weight for some of them that I don’t need to.
My 16×24 prints are double weight matte and everything else is single weight :)
Also, millers lab just announced they’re having a 50% off sale for large prints!